Friday, October 31, 2008

Champurrado

This post is a bit unusual for me in that it begins with a drink recipe. I’m sure I’ve mentioned my strict, self-imposed rule to never drink my calories. I don’t do smoothies or drink juices. I don’t drink beer. I might have a glass of wine or champagne on occasion, but generally, unless my ice cream melts has melted, I prefer to eat my calories.

But this is a special time. It’s Halloween. It’s the last day of the Vegan Month of Food. Tomorrow is my 3rd Veganniversary. Tomorrow is also Dia de los Muertos (Day of the Dead), which in many parts of the world is more special than its eve. So tonight I begin this post with a recipe from local chef and food writer Lucinda Hutson. You may remember earlier this month I posted her recipe for hummus and a picture of her fabulous purple bungalow. She wrote a guest feature in the paper about the traditional drink of Dia de los Muertos, Champurrado.

From Austin-American Statesman
Oct. 29, 2008


Friends have come to expect this frothy hot chocolate to accompany the Day of the Dead breads that I purchase at local bakeries. For centuries, Mexicans have devoured versions of this tasty and nutritional beverage; after all, chocolate is a New World offering. A cup of champurrado tastes both soothing and invigorating on a cold night. Spiked with chile, cinnamon and yerbanís (Mexican mint marigold) or anise seeds, its essence will surely awaken the dead.

Although traditionally made with water, milk makes it even richer, especially when whisked to a froth with a molinillo (a hand-carved wooden Mexican chocolate beater) twirled between the palms.

Champurrado

1/2 cup corn masa flour (masa harina)
1/2 cup warm water
2 cups milk
11/2 cups or more water
3 oz. Mexican chocolate
2 or 3 Tbsp. piloncillo (Mexican unrefined brown sugar) or dark brown sugar
1 tsp. Mexican vanilla
1 tsp. anise seeds, crushed, or 1 Tbsp. fresh yerbanís, optional (in season now)
1/4 tsp. cinnamon
1 stick canela (cinnamon)
1/2 tsp. crushed dried red pepper or chile de arból or cayenne
Pinch salt


In a medium saucepan, mix together masa harina and 1/2 cup warm water and blend until smooth. Add remaining ingredients; simmer on low heat, stirring continually until chocolate and piloncillo are melted and mixture has thickened (add more water if needed). Whisk with a wooden molinillo or eggbeater until frothy. Pour immediately into small mugs and sprinkle with cinnamon.

Serves: 4 to 6.

I prepared a ¼ portion of this recipe, omitting the anise seeds (ick) and using several more tablespoons of brown sugar, because as much as I love dark chocolate it’s got to be just a little sweet. The warm Champurrado is thick from the corn flour and chocolate, and I couldn’t manage more than a couple of sips. How they eat a hunk of sweet bread with it I’ll never know. Oh, wait. I think I read somewhere that you can make it into an adult beverage by adding a shot of whiskey, so maybe that’s how!

HOWEVER!... As any good foodie would do, after it was cold and before I put it away, I gave it another taste test. I tasted what was one of the best chocolate puddings I’ve ever had. It wasn’t creamy like a tofu pudding, but more like what I imagine the chocolaty oatmeal concoctions so many of you are enjoying. The masa flavor was unique and even though I was already stuffed, I wanted more. I probably won’t ever make it as a hot drink again, but it so quick and easy to make I will definitely make it as a pudding again. So do give it a try if you have an intense chocolate craving and want to try something different.

For your Halloween treats, let me show you more of the goodies I’ve tested for Ricki, and remind you once again to be on the lookout for her cookbook in a couple of months. Everything I’ve made has been incredibly delicious, and these were no exception.
Orange Tea Biscuit

Spice Cake


Macaroons


Finally, as this is the last day of MoFo, I just want to say how much I’ve enjoyed this incredible month of vegan food sharing. I’m amazed at how many fabulous chefs took part in this event! I think back to when I first started blogging about 2 ½ years ago. I tracked about 20 blogs. Now I can hardly keep up with the 200 I try to follow. I know many of you are used to posting daily, but I am not. I hope you don’t mind if I take a few days off, and then I'll resume my normal 2 posts per week.

Thursday, October 30, 2008

VeganMoFo – Spaghetti Squash, 2 Ways

I love spaghetti squash. I love to bake it, I love to fork it when it’s done, and I love to eat it because it tastes so good.

The first spaghetti squash meal was The Happy Herbivore’s Fiesta Spaghetti Squash.


This was a little reminiscent of Vcon’s Spaghetti Squash Mexicana and a great way to enjoy the squash.


The next meal was spaghetti squash tossed with my White Bean Garlic Sauce and mushrooms I used for the Daring Bakers pizza. This was a more traditional way to enjoy the squash and it too was really tasty.


Sheree asked for my sauce recipe, so here it is. FYI, Jessy posted a White Bean Gravy recently that looks similar.


White Bean Garlic Sauce

Makes 1-1/2 cups

1 can (15 oz.) cannelini or Great Northern beans, drained and rinsed
5 cloves garlic, chopped
½ t. kosher salt
¼ t. black pepper
½ t. red pepper flakes
1 t. Italian seasoning
1 T. olive oil
2 T. white balsamic or rice wine vinegar
¼ cup milk

Put all into a food processor and blend until smooth.

=======================================

I also made Roasted Radishes, which was posted by Stephanie at yum, yum kidcupcake!
She said they tasted like steak. I wasn’t craving steak, but I was curious.


I didn’t taste steak, but I did enjoy the radishes roasted. That’s what has been so great about the Vegan Month of Food. I have so many of your recipes bookmarked and I’ve really learned a lot from you all.

Final MoFo post tomorrow!

Wednesday, October 29, 2008

Daring Bakers Challenge - Pizza

This is my first Daring Bakers Challenge – Pizza! The real challenge here was to toss pizza dough – unless you elected to bake a gluten free pizza DOUGH, which is what I did. Although I didn’t get to enjoy the thrill of dough tossing, the very important thing I got from this challenge is that THERE IS NOW A FANTASTIC GLUTEN FREE PIZZA DOUGH! Big huge thanks to Natalie at Gluten A Go Go for this miracle.

Here is the recipe and detailed instructions for the gluten free version only, with my comments in color and pictures inserted. Please see other Daring Bakers for the *regular* dough recipe and pictures of dough tossing. I will attempt dough tossing at some point in the future!

~ BASIC PIZZA DOUGH ~

Original recipe taken from “The Bread Baker’s Apprentice” by Peter Reinhart.

(This is a half recipe.)

Makes 3 pizza crusts (about 9-12 inches/23-30 cm in diameter)

Ingredients:

2-1/4 cups GF Flour Blend with xantham gum or add 1 tsp xantham or guar gum
3/4 Tsp Salt
1 tsp Instant yeast
2 T Olive oil or vegetable oil (both optional, but it’s better with)
3/4 Cup + 1T. (7 ounces/210g or 210ml) Water, ice cold (40° F/4.5° C)
2 t agave syrup
gf flour for dusting

DAY ONE

Method:

1. Mix together the flour, salt and instant yeast in a big bowl (or in the bowl of your stand mixer).

2. Add the oil, agave syrup, and cold water, then mix well (with the help of a large wooden spoon or with the paddle attachment, on low speed) in order to form a sticky ball of dough.

3. Flour a work surface or counter. Line a jelly roll pan with baking paper/parchment. Lightly oil the paper.

4. With the help of a metal or plastic dough scraper, cut the dough into 3 equal pieces (or larger if you want to make larger pizzas).


NOTE: To avoid the dough from sticking to the scraper, dip the scraper into water between cuts.

5. Sprinkle some flour over the dough. Make sure your hands are dry and then flour them. Gently round each piece into a ball.


NOTE: If the dough sticks to your hands, then dip your hands into the flour again.
6. Transfer the dough balls to the lined jelly roll pan and mist them generously with spray oil. Slip the pan into a plastic bag or enclose in plastic food wrap.

7. Put the pan into the refrigerator and let the dough rest overnight or for up to three days.

NOTE: You can store the dough balls in a zippered freezer bag if you want to save some of the dough for any future baking. In that case, pour some oil (a few tablespoons only) in a medium bowl and dip each dough ball into the oil, so that it is completely covered in oil. Then put each ball into a separate bag. Store the bags in the freezer for no longer than 3 months. The day before you plan to make pizza, remember to transfer the dough balls from the freezer to the refrigerator.

That part was easy enough.

DAY TWO

8. On the day you plan to eat pizza, exactly 2 hours before you make it, remove the number of desired dough balls from the refrigerator. Place on a sheet of parchment paper and sprinkle with a gluten free flour. Delicately press the dough into disks about ½ inch/1.3 cm thick and 5 inches/12.7 cm in diameter. Sprinkle the dough with flour, mist it again with spray oil. Lightly cover the dough round with a sheet of parchment paper and allow to rest for 2 hours.

Well I actually goofed here and pressed the dough to 12 inches (instead of 12 cm.), which is a couple of steps further down. I put the parchment paper on the pizza stone so I would get the crust the right size. The nice thing about the gf dough is it holds its shape once it’s pressed. It doesn’t spring back like *regular* dough.

9. At least 45 minutes before making the pizza, place a baking stone on the lower third of the oven. Preheat the oven as hot as possible (500° F/260° C).

NOTE: If you do not have a baking stone, then use the back of a jelly roll pan. Do not preheat the pan.

10. Press the dough into the shape you want (about 9-12 inches/23-30 cm in diameter - for a 6 ounces/180g piece of dough). DO NOT TOSS GF DOUGH!


At this point I got my ingredients mise en placed.


11. Lightly top it with sweet or savory toppings of your choice. (includes sauce and cheese)

I made a White Bean Garlic Sauce and used my favorite colorful toppings - shitake mushrooms (because it was my very own pizza and I’m the only one who likes mushrooms!), red bell pepper rings, yellow and orange tomatoes, and green onions. It’s not especially creative, but it’s what I wanted to eat.


12. Place the garnished pizza on the parchment paper onto the stone in the oven or bake directly on the jelly pan. Close the door and bake for about 5-8 minutes.

NOTE: Remember that the best pizzas are topped not too generously. No more than 3 or 4 toppings (including sauce and cheese) are sufficient.

I used only a half cup of sauce. The pizza was almost too heavy to move to the stone without risk of breaking apart.

13. Slide the garnished pizza onto the stone in the oven or bake directly on the jelly pan. Close the door and bake for about 5-8 minutes.

NOTE: After 2 minutes baking, take a peek. For an even baking, rotate 180°.If the top gets done before the bottom, you will need to move the stone or jelly pane to a lower shelf before the next round. On the contrary, if the bottom crisps before the cheese caramelizes, then you will need to raise the stone or jelly.

I baked for 3 minutes, rotated, and then baked 3 minutes more.

14. Take the pizza out of the oven and transfer it to a cutting board or your plate. In order to allow the cheese to set a little, wait 3-5 minutes before slicing or serving.

NOTE ON SAUCE: Your sauce should not be too thick as it will thicken in the hot oven. Less is more but make the less truly more by using quality ingredients.

Here’s a slice. It was easy to cut through the crisp crust.
And look how well it holds up. I’ve never been able to pick up a gluten free crust before!


I had a nice side of Roasted Sweet Potato Salad with it. I went back for seconds, and thirds!


Are you wondering about leftover gluten free pizza? I haven’t eaten it yet, but it’s still as crisp as ever in the fridge right now, 2 days after I baked it.

I became a Daring Baker at just the right time. I can’t tell you how thrilled I am to be able to make gluten free pizza dough that everyone can enjoy.

Tuesday, October 28, 2008

VeganMoFo – Roasted Sweet Potato Salad

Instead of the usual sweet potato fries to go with my Monster Burger for Halloween dinner, I made a Roasted Sweet Potato Salad with Apple Cider Vinaigrette. This is so yummy and reminds me a little of a salad recipe Bryanna posted during Canadian Thanksgiving. My recipe is certainly very adaptable and would be a great Thanksgiving or Christmas salad as well.


Roasted Sweet Potato Salad

Ingredients:
1 medium sweet potato, peeled and diced
1/2 t. salt, kosher or sea salt
1/2 t. black pepper
1 T. olive oil
3 ounces fresh baby spinach
2 T. chopped purple onion
1 T. chopped green onion
2 T. dried cranberries
¼ cup Apple Cider Vinaigrette (recipe below)

Directions:
Heat oven to 400 degrees. Toss sweet potatoes with olive oil, salt, and pepper. Spread on baking and sheet and bake for 20 minutes or until fork tender. Set aside to cool.

In a medium bowl, toss together the sweet potatoes, spinach, onions, cranberries, and vinaigrette. Serve extra dressing on the side.

Apple Cider Vinaigrette
(inspired by Taste of the South)

Whisk together:
¼ cup olive oil
¼ cup apple cider
1 T. apple cider vinegar
2 teaspoons agave nectar
1 t. dried thyme
1 t. minced green onion
S&P to taste

========================================

A couple of notes:
I posted some snacks awhile back and mentioned the Cherry Pie Oohmega Bar.


It’s very very good and I can’t wait to try some other flavors.

I really do love Celine’s Pumpkin Bread. I have three huge buns left over. How awesome would it be if you toasted it, then used it for Hannah’s Pumpkin Bread Pudding??!!! If you haven't seen Hannah's recipe, go look now!

I’m so tired from my workout tonight, but 3 more posts and I will have posted EVERY DAY of MoFo! It was nice to see that the ppk blog noted this along with a picture of my Halloween Black Bean Soup, as well as an entrée from River and cookies from Shellyfish, on Isa’s Halloween Roundup.

3-2-1.....

Monday, October 27, 2008

VeganMoFo – Monster Burger


Okay, it’s lame, but Monster Burger is all I came up with for my Halloween dinner. Chase’s band has a gig Halloween night and he’s been rehearsing and hasn’t been over to eat in a while. Anyway, no gross foods for me, but I do like fun and tasty food.

Here’s a burger tutorial for you.

The perfect burger must start with a great bun. Celine has great buns. (Sorry, I couldn’t resist, Celine.) Great Halloween buns are Pumpkin Buns! I have made this recipe in loaf form a couple of times and it is, as Celine said, the best sandwich bread ever. The bun version is just as good. Her recipe makes six huge buns. I topped them with black sesame seeds so they could be Halloweeny.


Great Halloween burger patties are Black Bean Burgers! I’ve used this recipe many many times, via Kate, via Sheree. (To make them gluten free, substitute a gf flour for the wheat germ.)


A great burger should also be grilled, but I didn’t think of it until it was already dark. These burgers will hold up for grilling.

Did you know mustard should only go on the bottom bun (or slice of bread for a sandwich)? Why? Because it’s too spicy for the roof of your mouth. Save the top of your sandwich for mayo and/or ketchup. I build my burger like this: mustard, crisp lettuce, burger (to hold down the lettuce), chopped tomato (so you don’t pull the whole slice off), one large and one small ring of onion, and ketchup (never was a mayo girl). Here is my Halloween orange and black Monster Burger.


My perfect Monster Burger.

As I am stretching my posts to last through this final week of MoFo, tomorrow I will post my recipe for the side dish I had with my burger. It’s not fries.

PS – My mom loves the Delicata Squash Bisque.

PSS - I took the Snickerdoodle Pie to the office today where it was devoured. The whole building had the most wonderful aroma of cinnamon all day long.

Sunday, October 26, 2008

VeganMoFo – OMG Snickerdoodle Pie!

This was the most pie fun I’ve ever had! I baked a giant snickerdoodle cookie you eat warm, all sugary and cinnamony. It’s not healthy, it’s not gluten free, but it is vegan and incredibly delicious. There’s gooey cinnamon covering the crust, then super soft white cake, then crispy gooey cinnamon on top. I only wish I had thought it up myself.


I veganized this recipe. Here’s the vegan version.

Snickerdoodle Pie

Ingredients:
1 recipe for 9-inch pie crust*
2 t. melted margarine
1 T. raw or coarse sugar
½ t. cinnamon

¼ cup margarine
½ cup brown sugar, packed
3 T. water
2 T. light corn syrup
½ t. cinnamon
1 t. vanilla

¼ cup softened margarine
½ cup granulated sugar
¼ cup powdered sugar
1t. baking powder
½ t. salt
¼ t. cream of tartar
1 energ egg replacer
1 t. vanilla
½ cup nondairy milk
1-1/4 cups AP flour

* I used the pie crust recipe from Sinfully Vegan and I do not recommend it. It’s oil based and this pie needs a margarine crust. Also, this crust wasn’t sturdy enough. It kept sliding down the rim.

Directions:
Heat oven to 350 degrees. Prepare your pastry and put into a 9-inch pie plate. Brush with melted margarine.

Mix together the raw sugar and cinnamon. Sprinkle 1 teaspoon over the pie crust.

Make a syrup by combining the ¼ cup margarine, brown sugar, water, corn syrup, and ½ teaspoon cinnamon in a small sauce pan. Stir and bring to a boil, then boil gently for 2 minutes. Stir in 1 teaspoon vanilla. Set aside.

In your mixer, beat the softened margarine for a minute, until creamy. Stir in both sugars, baking powder, salt, and cream of tartar. Mix until well combined. Stir in egg replacer and vanilla. Slowly mix in milk, then flour. Spread evenly over crust.


Carefully pour syrup over batter, then sprinkle with remaining cinnamon sugar mixture.


Cover edges of crust with foil.

Owning a pie shield makes me a complete baking geek, doesn’t it?


Bake 25 minutes, then carefully remove the foil. Bake 15 – 20 minutes more or until top is puffed and browned and a tester comes out clean. Cool 30 minutes. Serve warm.

It looks kind of funny when it comes out of the oven, but it smells divine.


Better go make it now, then have yourself a nice warm slice.


Saturday, October 25, 2008

VeganMoFo – Delicata Squash Bisque


This morning I overslept and had 3 hours to do house stuff before being gone all day. So I didn’t really feel like doing house stuff and decided to cook – something, anything. Since I was going to see my mom, I decided I should make something for her dinner. It’s not soup weather here, but I’ve been drawn to Vegan YumYum’s Delicata Squash Bisque ever since she posted it. And then I saw Awesome.Vegan.Rad rave about it.

I had only one small delicata, so I used it along with a small butternut squash. Like I said, I had no business trying to make a proper bisque, much less get a proper photograph of it. I didn’t get to make it as smooth as I wanted to, or make a fancy squiggle garnish either. But let me tell you, this bisque is heavenly. I just had a small bowl for dinner. It’s simply flavored, very filling, and has a lovely spice from just black pepper. I’m so used to heat from chili peppers and this was a nice reminder that spice can come from something other than hot peppers. Don’t let my photo deter you. Put this on your *must make* list.


Friday, October 24, 2008

Spreadin' the Word


Earlier this week, our local food editor asked me if I would like to be featured on her online edition of “What’s in Your Fridge Friday.” She said she loved my vegan recipes and blog and wanted to highlight it. Of course I agreed. So that was the *fun project* I worked on. She asked about my background and then I was to answer three questions. I had so much I wanted to submit, but you never know what will actually get printed. She posted the picture of my overstuffed fridge from my earlier blog post, and also one that I submitted that looked a little more typical. AND she wants to use one of my recipes for her *Thanksgiving Sides* feature which will actually be printed in the paper. I’m really excited about that!

So here’s what was posted:

Relish Austin

Vegan blogger Diann M______: What’s in Your Fridge Friday?


By Addie Broyles Friday, October 24, 2008, 07:00 AM

Diann M_______, the Austin blogger behind Eat’n Veg’n, says she has always enjoyed cooking and baking and about three years ago became a vegan to improve her eating habits. She was worried that because she’s into weight training that she wouldn’t get enough protein as a vegan. “Like most nonvegans, I believed meat was the only source of protein,” she says. “Beans have now taken the place of meat in my diet. I cook a huge pot of pintos, lentils, black beans or chickpeas every weekend.”

What 3 things are always in your fridge? Assorted fresh veggies, but always fresh broccoli, homemade beans, and almond milk.

What’s your favorite locally made product? That’s a tough one. There are so many wonderful ones to choose from and they are so readily available from Whole Foods. But I’ll have to go with NadaMoo vegan ice cream, plain vanilla flavor. It’s the best vanilla ice cream I’ve ever tasted. A veggie and pesto pizza from East Side Pies is a pretty great treat too.

What your favorite thing to cook for your nonvegan friends? The easiest way to win over nonvegans is with baked goods. My family recently declared my chocolate cake with chocolate peanut butter frosting the best dessert ever. The most impressive meals to prepare for nonvegans are those that are naturally vegan. Nonvegans aren’t easily fooled into believing they are eating meat. With cooler weather here now, I would prepare Sweet Potato and Black Bean Chili with with cornbread or Homemade Falafels and Lentil Soup. Of course there would be brownies or chocolate chip cookies for dessert.

Fun!

Thursday, October 23, 2008

VeganMoFo – Five Minute Meal

One of my favorite (only?) super quick dishes consists only of a can of blackeyed peas mixed with a can of tomatoes with green chilies. It’s a meal in itself or a spicy side dish which Chase happens to love as well. Tonight I added some of my fresh greens to it and made it extra yummy. Beans and tomatoes are pretty much the only things I eat from a can. They just happen to go really well together. A side of steamed broccoli and some gluten free crackers and you’ve got yourself a five minute meal.


Ooops, I almost forgot your treat! How about one of Ricki’s Blondies?


I know you're like me and can’t wait for her cookbook!

Wednesday, October 22, 2008

VeganMoFo – Sunday Dinner on Tuesday


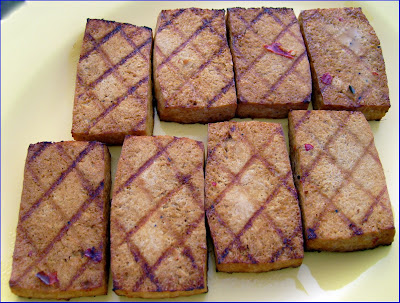
You may recall that my Sunday dinner had to be put on hold. I had marinated some tofu steaks to grill and made an Asian Pesto to go with it. Last night I finally got to put the meal together. First I grilled the tofu on the outdoor grill. It turned out perfectly.


I made a Snow Pea Slaw by mixing together a bag of broccoli slaw, grated daikon, bean sprouts, and blanched snow peas, and used Litehouse Sesame Dressing.


I made the best fried rice too. When I prepared the tofu for grilling, I set aside some of the tofu to scramble to add to the rice. Do you all do this already or did I come up with something novel? I’m not sure if the scrambled tofu or the 365 brand teriyaki sauce made the fried rice so good, but it was really really delicious.


Naturally Chase didn’t have time to come eat, so I packed it all up for him to take home. I found a clean Pei Wei takeout container for the tofu. Eight pieces stacked in there nice and snug. I bagged up some slaw and packed up a big container of the rice. (Yes, I know Chase is spoiled.)


I took the opportunity to test another recipe for Ricki so Chase could have a treat. I made her Ultra Fudgy Brownies, which really live up to their name. Guess what – they are sensational, like every other recipe I’ve tested. I was smart and made them in a carry away foil pan so I wouldn’t eat them all. I remembered to give Chase the pesto too.


Yes I did have a piece of that brownie!


Mmmmmmmmmmm. Now I have a fun project to work on which I will share with you later, and I should be able to peek in on all your blogs later this evening.

Tuesday, October 21, 2008

VeganMoFo – Moroccan Roasted Vegetables

On the advice of Julie, who promised even eggplant haters would love this recipe, I prepared Moroccan Roasted Vegetables from Moosewood New Classics. I had many fresh veggies from my CSA box, including 2 little Japanese eggplant. I actually wavered between making this recipe and Heathen Vegan’s Mediterranean Crumble, but decided to go gluten free. Check out Jeni’s Rosti recipe with that Crumble too!

I chopped up onions, yellow tomatoes, purple and yellow peppers, the eggplant, zucchini, a hot red chili, and added in some baby carrots and the chickpeas. (I left out the sweet potato too, Julie.) Then I mixed all the spices and tossed them into the veggies. Here they are ready to roast.


Forty minutes later they rested atop some steamed broccoli, got topped with almonds and raisins, and dinner was served.


It was so good and I couldn’t even tell I was eating eggplant – just the way I like it!